Diamond painting has quickly become a favorite among DIY craft distributors and retail buyers alike. It combines the precision of mosaic art with the accessibility of an all-in-one activity kit — offering consumers a relaxing, visually rewarding craft. Many craft stores and eCommerce sellers now stock diamond painting kits because they appeal to a wide age range and require minimal setup compared to embroidery or paint-by-numbers.
Diamond painting is a simple, therapeutic craft that involves placing tiny resin “diamonds” onto an adhesive color-coded canvas, creating a sparkling image. To start your first diamond painting, you’ll need a well-prepared kit, an organized workspace, and some patience — the process is methodical but beginner-friendly.
From a B2B sourcing perspective, understanding the step-by-step process helps suppliers and wholesalers evaluate kit completeness, material quality, and consumer usability before placing bulk orders. Let’s walk through the essential setup and workflow so you can understand not just how to paint with diamonds, but how to evaluate product quality and packaging for retail success.
What tools and accessories do I need before starting my first diamond painting project?
Diamond painting kits are typically sold wholesale with all required tools, making them easy to stock in craft stores or online shops. However, differences in accessories can affect user experience and perceived value.
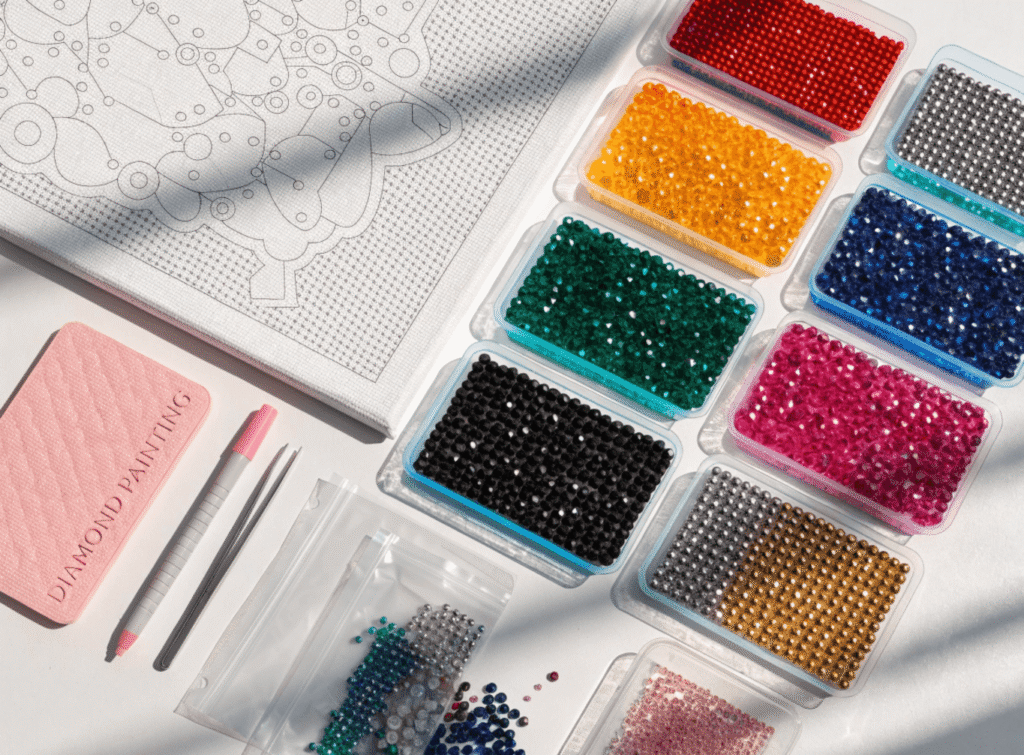
The basic toolkit components
Here’s a breakdown of what most standard kits include and their role in the craft process:
| Item | Purpose | Buyer Insight |
|---|---|---|
| Adhesive printed canvas | The design base, with clear protective film | Check glue coverage uniformity; uneven adhesives frustrate users |
| Resin diamonds (drills) | Tiny faceted pieces in round or square shapes; each color coded | Verify color clarity and shape accuracy—cheap resins can appear dull |
| Diamond applicator pen or stylus | Picks up drills using wax tip | Multi-placer pens add retail appeal for advanced users |
| Wax pad/block | Loaded into pen tip for pickup tackiness | Must be clean and non-oily for adhesive stability |
| Plastic tray | Used to align drills upright | Grooved trays help speed workflow |
| Tweezers | Optional, for repositioning drills | Premium kits include metal tweezers; basic kits may omit them |
Some suppliers also include zip-lock bags, compartment boxes, or resealable tubs for organizing diamonds — these packaging upgrades increase the value perception and minimize consumer frustration with mixed drills.
Quality considerations for wholesale buyers
When sourcing diamond painting kits in bulk:
- Check the adhesive strength of the canvas; poor-quality glue causes drills to fall off prematurely.
- Inspect color printing clarity; blurred symbols confuse beginners and lead to high return rates.
- Choose eco-friendly resin drills for regions with strict plastic safety standards (especially EU).
- Request samples that showcase packaging display (carton boxes vs. flat rolled film sleeves) to evaluate shelf appeal.
How can I choose the right canvas size and drill type for my design?
Choosing the correct kit format depends on the end-user segment your business targets. For sellers catering to hobbyists or beginners, smaller canvases are often ideal. For distributors working with art enthusiasts or premium markets, larger canvases and square drills offer higher perceived artistic value.
Canvas sizes and skill levels
| Canvas Size (inches) | User Skill Level | Average Completion Time | Market Recommendation |
|---|---|---|---|
| 8″ × 12″ | Beginner | 5–10 hours | Great for craft workshops and first kits |
| 12″ × 16″ | Intermediate | 12–20 hours | Suitable for retail starter sets |
| 20″ × 24″ or above | Advanced | 25+ hours | Ideal for experienced crafters or gifting bundles |
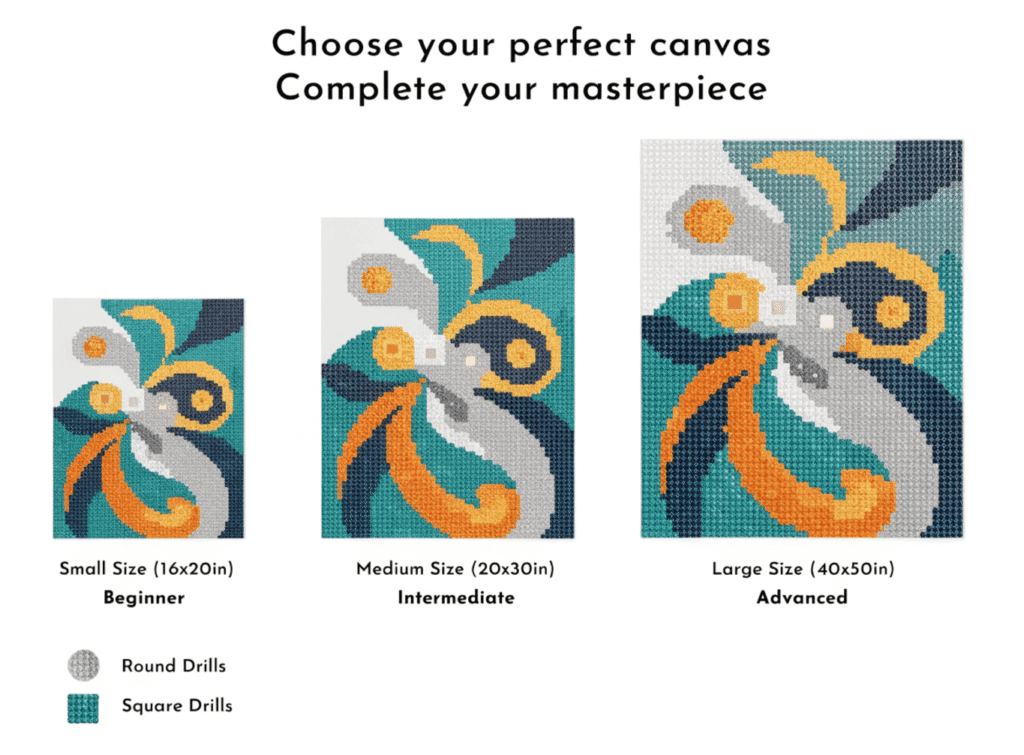
Understanding drill types
Drills come in two shapes — round and square — and both appeal to different market segments.
- Round Drills: Easier for beginners to place; forgiving alignment; produce softer sparkle.
Best for educational craft kits or family-friendly craft sections. - Square Drills: Need precise placement; result in a gap-free, tiled finish.
Preferred by professional craft enthusiasts and advanced DIY customers.
Evaluating design complexity
From a wholesale perspective, designs with large color blocks reduce customer frustration. Avoid overly detailed or photorealistic prints in entry-level assortments.
Tip for sellers: Offer “graded” collections — Simple, Intermediate, and Premium — so buyers can choose based on their customers’ skill levels.
What’s the best way to organize my diamond drills for efficiency?
Proper organization directly impacts user satisfaction and reduces spill-related returns. Many first-time crafters underestimate how challenging it is to handle dozens of drill colors — efficient storage solutions can make or break their experience.
Step-by-step method for organizing drills
- Inventory check: Verify drill packet quantities against the canvas legend before starting.
- Labeling: Attach clear labels with symbols or DMC codes on each bag/container.
- Color segregation: Store similar shades (reds, blues, greens) together for visual organization.
- Small batch pouring: Cut open only one or two packets at a time to prevent mixing errors.
- Tray handling: Pour drills onto a tray and shake gently to align the flat sides down for smooth pickup.
Recommended accessories for retailers or suppliers
| Accessory Type | Usage Benefit | Wholesale Tip |
|---|---|---|
| Small resealable bags | Economical color storage | Offer in combo packs of 100–200 pcs |
| Lockable storage boxes | Professional-grade organization | Premium upsell option for craft enthusiasts |
| Label stickers | Easy identification | Include branded or color-coded labels for brand recognition |
| Multi-compartment tray sets | Speeds up sorting | Good for workshop/demo packs |
Buyer insight: Packaging matters
Buyers — especially eCommerce resellers — should ensure the drill packs are clearly numbered and contain extra quantity (usually 10–15% more drills than required) in each color to offset loss during handling. This small manufacturing consideration dramatically reduces complaint rates and improves brand trust.
How can I ensure the adhesive surface stays clean during work?
The adhesive canvas is the foundation of every diamond painting project. If dust or hair sticks to the surface, it can ruin drill placement and overall finish quality. Maintaining the adhesive layer is therefore essential for both product longevity and user experience.
Practical prevention steps
- Work in small sections: Peel only a manageable area of the plastic film while painting — usually 3–4 inches at a time.
- Protect unused areas: Re-cover exposed portions immediately if pausing work.
- Clean environment: Avoid eating or drinking near the workspace.
- Edge guards: Use washi tape or painter’s tape around the edges to prevent adhesive seepage or debris.
- Post-work pressing: Use a roller gently over completed sections to secure drills without pushing stray dust into glue.
Handling the protective film
Most adhesive canvases have a clear plastic film. Buyers must ensure:
- The film thickness is balanced — thin films tear easily, while overly thick ones warp.
- The adhesive area has uniform stickiness — some manufacturers use uneven coating that loses grip over time.
Tips for wholesalers and importers
When evaluating production samples from suppliers:
- Inspect the adhesive base sheet for clean, dust-free lamination.
- Check if the canvas can endure repeated film lifts without losing stickiness — a sign of quality glue chemistry.
- Consider adding instruction inserts about proper adhesive care; kits with educational packaging appeal more to beginners.
The Step-by-Step Diamond Painting Workflow (Summary)
Beginning a diamond painting project can be broken down into twelve easy steps that any buyer or crafter can follow. Understanding this process also helps wholesalers plan better product demonstrations for marketing content.
- Choose a suitable kit: Match design complexity to customer skill level.
- Prepare workspace: Ensure good lighting and flat surface.
- Unbox and inventory contents: Check drill packet codes against legend.
- Understand the canvas symbols: Each printed symbol corresponds to a color.
- Organize drills: Use storage boxes or labeled bags to separate colors.
- Load the pen with wax: Pick drills accurately.
- Expose a small canvas section: Keep the rest covered.
- Place drills carefully: Match symbols and colors.
- Continue section by section: Maintain neat placement and clean canvas.
- Fix minor misalignments: Use a ruler or tweezers.
- Press completed surface: Secure with roller or brayer.
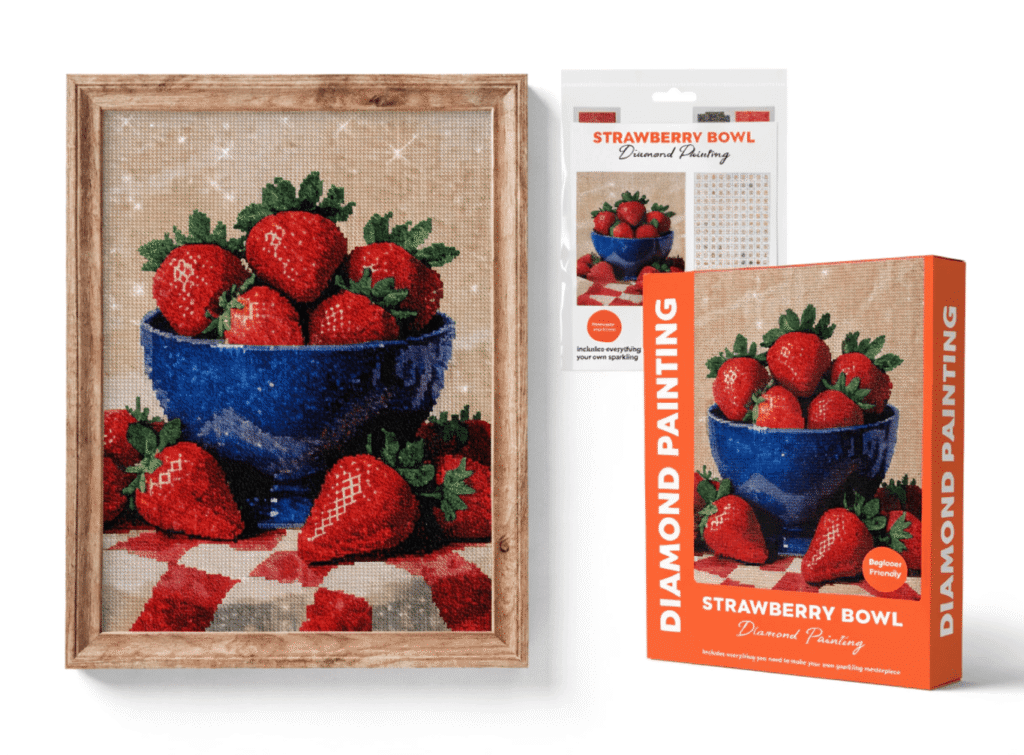
- Frame or package artwork: Offer display-ready finishes for gifting or retail sale.
Many suppliers create instructional inserts or QR codes linking to video tutorials based on this workflow — adding immense value to DIY buyers.
Common buyer insights for stocking diamond painting kits
- MOQ consideration: Entry-level global orders typically start at 100–300 units per design, depending on kit complexity.
- Customization options: Private labeling on packaging boxes or drill bags helps craft retailers build brand identity.
- Seasonal trends: Designs featuring florals, animals, or motivational quotes sell well in Q4 gifting season.
- Packaging upgrades: Gift-box packaging with magnetic lids offers higher perceived value than plastic sleeves.
- Market positioning: Educational kits for younger audiences (with simpler designs and round drills) are among top-selling variations in Europe and North America.
Soft Call to Action
If your business is planning to expand into relaxing craft products such as diamond painting kits, collaborating with a specialized manufacturer can streamline sourcing, packaging customization, and regulatory compliance. You can explore OEM kit development, private labeling, or interactive craft bundles that combine painting, embroidery, and mosaic activities for greater shelf appeal.
For professional advice or custom product requests, consider reviewing [wholesale DIY craft kits] or [educational craft supplies] for integrated sourcing strategies.
Key Takeaways for Craft Distributors and Buyers
- Prioritize complete toolkits with well-coded drills and clear printed canvases.
- Offer tiered kit assortments to serve different customer skill levels.
- Maintain attention to adhesive quality, packaging design, and component precision for reliable retail performance.
- Build supplier relationships focused on consistent quality checks and visual presentation standards.
Diamond painting continues to dominate craft retail trends because it gives end users a sense of mindfulness, creativity, and instant gratification. For B2B buyers, mastering its process and product nuances ensures every kit shipped provides lasting sparkle — on both the canvas and in your business results.