As a jewelry manufacturer and wholesale supplier, I’ve witnessed countless creators begin their journey with DIY jewelry kits. These kits have democratized jewelry design, allowing aspiring makers, boutique brand owners, and even small-scale retailers to experiment with custom production without large upfront factory commitments. However, while these kits can be an excellent gateway into professional craftsmanship, many beginners encounter predictable, costly errors that hinder progress and compromise product quality. Understanding and avoiding these mistakes from the start ensures smoother sampling phases, better-quality prototypes, and stronger business scalability in the fashion jewelry supply chain.
Beginners often skip essential steps such as proper material selection, tool use, and plating control. Avoiding issues like mismatched wires, excessive force during assembly, and poor quality verification ensures finished jewelry looks professionally made. Choosing high-quality base materials (stainless steel, brass, or alloy), adhering to QC standards, and aligning handmade samples with bulk production tolerances are the keys to consistent results for OEM/ODM-scale jewelry manufacturing.
From a strategic standpoint, understanding beginner pitfalls in jewelry making also benefits B2B sourcing and brand management. Handmade sample kits often serve as early prototypes for private label buyers evaluating new suppliers. Identifying these common errors early informs your brand’s production policies—improving design guidelines, batch QC protocols, and training modules. In this article, I’ll share insights from both a manufacturer’s and designer’s perspective to help you fine-tune your sample development and streamline scaling from DIY prototypes to commercial wholesale jewelry production.
Inadequate Tool Knowledge and Selection
An overlooked but pivotal factor in jewelry kit success lies in understanding your tools—the mechanical foundation of jewelry craftsmanship. Beginners often assume any tool resembling pliers or cutters will do the job, but jewelry pliers are crafted with specific tolerances and shapes to handle delicate materials.
The Importance of Correct Tools
- Wire cutters: Designed to prevent fraying and metal fatigue on thin gauge wires. Scissors, on the other hand, cause flattened or split wire ends.
- Round-nose pliers: Essential for creating loops in headpins and eyepins without damaging soft wire finishes.
- Flat-nose pliers: Used for holding or bending components; avoid utility pliers that leave marks.
- Crimping pliers: Achieve secure, professional crimps by creating a small crescent shape and then rounding it.
Over-tightening crimps or clasps with unregulated force can actually decrease durability. I’ve seen numerous prototypes fail stress testing due to over-crimping—leading to weak joints and snapped threading materials.
Recommended Beginners’ Toolkit Specification
| Tool Type | Function | Beginner Tip |
|---|---|---|
| Flat-nose pliers | Grip and hold components | Wrap tips with tape to avoid scratches |
| Round-nose pliers | Create loops | Practice on copper wire before using brass |
| Wire cutters (flush cutter) | Cut wire cleanly | Avoid using them on steel to prolong life |
| Crimping tool | Secure bead tips or clasps | Learn dual-step crimp method |
| Beading mat or board | Keeps beads enclosed | Mark sizes for necklace/bracelet layout planning |
Using proper tools may seem like a small detail, but in jewelry production—particularly for high-end stainless steel or plated alloy lines—tool precision determines product presentation and structural longevity.
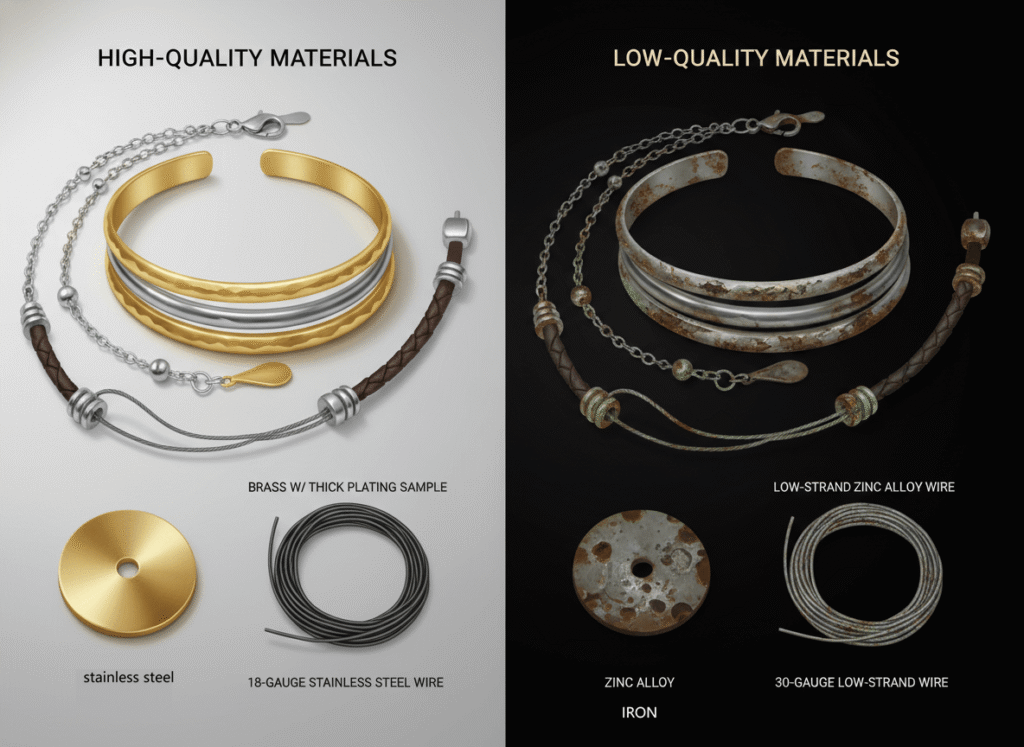
Material Quality Neglect: Wires, Threads, and Base Metals
Many DIY jewelry makers underestimate the importance of base materials. When I develop new prototype collections for private label clients, we always start by comparing tensile strength, plating quality, and compatibility between metals and threads. This applies even in small-batch handmade kits.
Common Beginner Mistakes
- Using low-strand-count wire (7 or fewer strands) that breaks after minimal bending.
- Combining heavy beads with delicate stringing wires.
- Choosing visually attractive but incompatible bead coatings that wear off during assembly.
- Failing to choose metal bases appropriate for planned plating methods.
Comparing Common Jewelry Base Materials
| Material | Durability | Tarnish Resistance | Weight | Best For |
|---|---|---|---|---|
| Stainless Steel | Excellent | High | Medium | Long-lasting modern fashion jewelry |
| Brass | Moderate | Good (with lacquer) | Medium | Trend-driven costume jewelry |
| Zinc Alloy | Fair | Moderate | Light | Entry-level accessories & experiments |
| Sterling Silver | Excellent | Needs maintenance | Medium | Premium custom brand lines |
Beginners who don’t understand these differences often produce test samples that look fine short-term but corrode or lose luster over time, especially after exposure to moisture or cosmetics. For brands testing new suppliers, I recommend requesting sample plating charts showing microns of gold, rose gold, or rhodium coatings—generally 0.03–0.5μm thickness depending on budget and wear longevity targets.
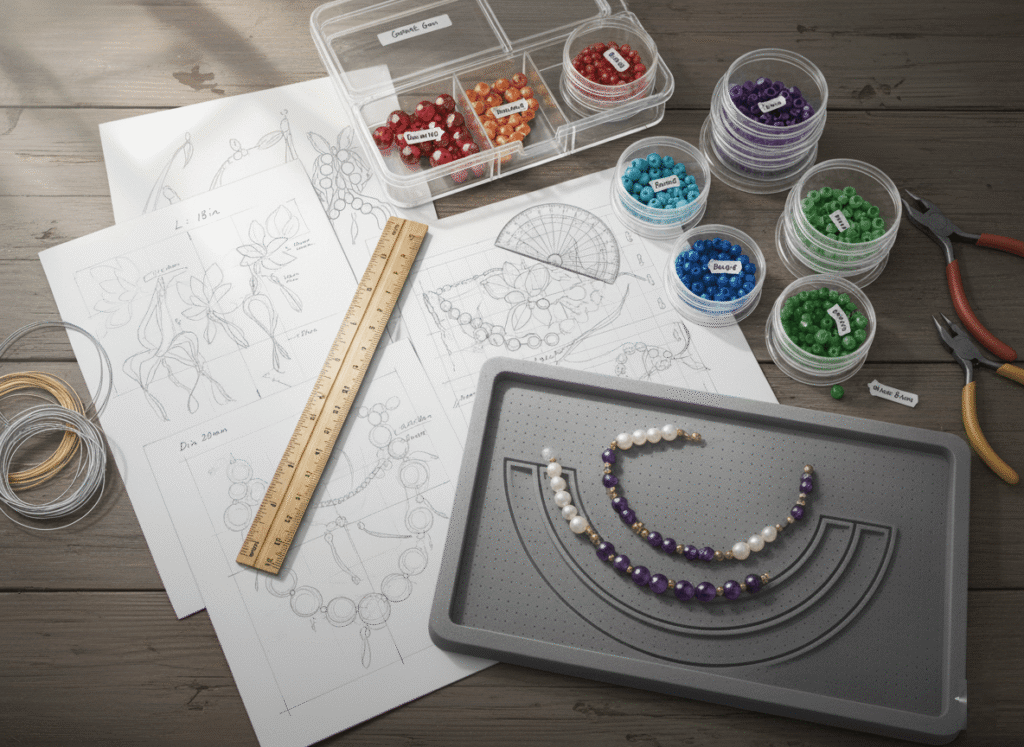
Lack of Planning and Design Consistency
Beginners frequently jump straight to stringing beads or bending wire without design mapping. In wholesale and private label manufacturing, this is analogous to skipping the CAD or sampling stage—sure to increase costs downstream.
Why Planning Matters
Without design sketches and measurement guidelines:
- Component mismatch occurs (e.g., clasp hole too small for wire gauge)
- Uneven product sizing in batch production
- Unnecessary rework inflates material waste and labor time
When developing OEM/ODM samples, my team always creates digital spec sheets with tolerance margins (±2mm) to standardize production quality. This is valuable even for small-scale jewelry kit users. Beginners should track design ratios, such as bead diameter-to-string spacing, ensuring flexibility and tension balance across necklaces or bracelets.
Layout & Measurement Tips
- Always measure total necklace length beforehand using a bead board.
- Leave at least 1.5–2 cm of wire tail for crimps on each end.
- Keep components organized by segment to avoid confusion between pattern repeats.
- Test fit and movement: flexible jewelry lasts longer and feels premium.
Design balance doesn’t just affect aesthetics but also wearability and brand perception. Unbalanced weight or stiffness translates to lower perceived quality and increases after-sales complaints in wholesale operations.
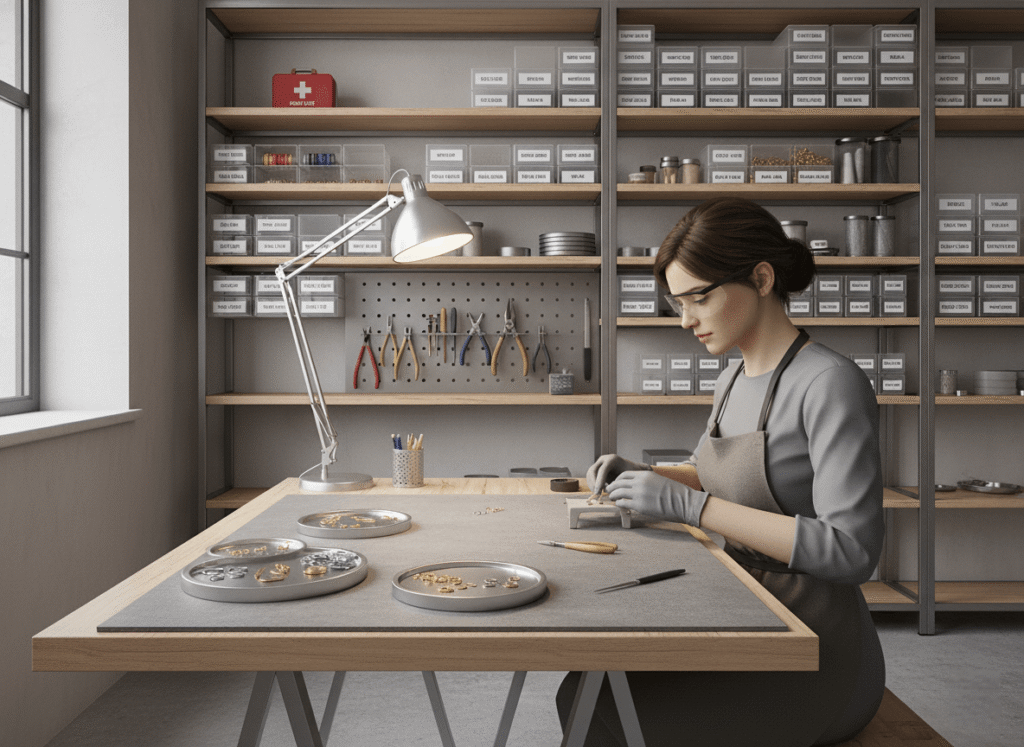
Workspace Limitations and Organization Mistakes
Organization is often overlooked, yet it can make or break a project. A cluttered workspace contributes to inefficiency and lost materials, especially small jump rings, crimps, or beads. In a manufacturing context, this parallels poor production line setup—a sure way to increase error rates and slow throughput.
Setting Up a Productive Jewelry Workspace
- Lighting: Use daylight-balanced lamps (5000–5500K) to prevent color mismatch between beads and metal tones.
- Surface: Employ soft beading mats to prevent items from rolling off.
- Storage: Small parts boxes or magnet trays keep findings in order.
- Tools Arrangement: Maintain ergonomic spacing—pliers should always be within 40 cm reach.
For factories and workshops scaling handmade samples into structured production runs, this principle extends to tool calibration, storage safety, and assembly order. Even a well-designed workstation reduces average assembly time per unit and enhances consistency.
Thread and Needle Coordination Errors
An improperly paired thread and needle combination is a classic beginner problem that also disrupts semi-handmade sampling processes for manufacturers. Using thread too thick for delicate beads causes cracking, while overly thin thread leads to weak joins.
Professional Recommendations
- Use nylon-based beading thread like Nymo or KO in size D (0.3mm) for small beads.
- For heavier beads, adopt 19-strand stainless or silver-plated beading wire.
- Always condition thread with beeswax or thread conditioner. This minimizes fray and knotting.
Needle Size Reference
| Bead Type | Recommended Needle Size | Thread Type |
|---|---|---|
| Seed beads | Size 12 | Nylon or FireLine 0.1-0.2mm |
| Gemstone beads | Size 10 | Silk thread or 19-strand wire |
| Metal beads | Size 8 | Coated steel wire |
Using well-matched components not only prevents bead breakage but also enhances the overall flexibility of the piece, resulting in professional-grade prototypes.
Avoiding Advanced Techniques and Finishing Skills
Many beginners hesitate to try professional techniques such as wrapped loops, soldering joins, or multi-strand terminations, fearing difficulty. However, skipping these methods leads to unstable products unfit for retail presentation.
Key Finishing Techniques to Learn Early
- Wire wrapping: Neater and stronger than open loops.
- Crimp cover installation: Gives polished, high-end look.
- Jump ring closing: Proper closure ensures component stability.
- Chain connection: Avoid open rings under tensile stress.
At a factory scale, these techniques equate to mechanical assembly standards that maintain structural integrity. We apply pull tests on samples to simulate daily wear—something even DIY artisans can practice manually.
Overbuying and Poor Inventory Management
Beginners—especially enthusiastic ones—often start by buying too many beads, metals, or charms. While variety offers creative freedom, it causes unnecessary clutter and immobilizes creative flow.
From a sourcing standpoint, this mirrors poor procurement planning in B2B operations. For jewelry brands, buying excessive quantities before finalizing design specs risks overstock and misalignment between seasonal trends and material inventory.
MOQ & Supply Planning in Professional Context
In wholesale jewelry sourcing:
- Start with focused SKUs — test 3–5 designs rather than 30.
- Align MOQ (Minimum Order Quantity) with confirmed colorways after sample approval.
- Maintain material compatibility sheets to avoid plating mismatch in mixed materials.
This disciplined purchasing mindset translates well from DIY makers to large-scale jewelry procurement managers.
Ignoring Quality Control and Testing
Even handmade jewelry deserves systematic quality checks. Beginners rarely review finished results against defined standards—for instance, measuring consistency of bead spacing or clasp alignment.
QC Standards for DIY and Wholesale Jewelry Production
| QC Category | Standard | Testing Method |
|---|---|---|
| Plating thickness | ≥0.03μm gold layer | Visual check + electronic tester |
| Crimp tension | Firm, flexible join | Pull test by hand (gentle force) |
| Wire integrity | No nicks or frays | Visual magnification |
| Assembly alignment | Even spacing & fit | Lay flat, check symmetry |
Applying these small-scale QC habits ensures your handmade jewelry prototypes meet expectations before scaling into wholesale quantities.
Neglecting Safety Protocols
Beginners can underestimate the dangers of small yet powerful jewelry tools. Soldering, wire cutting, or adhesive application can lead to injuries if executed carelessly.
Safety Checklist
- Always wear eye protection when cutting or soldering.
- Keep ventilation adequate when using adhesives or plating chemicals.
- Handle sharp edge trimming tools with caution.
- Maintain fireproof surfaces for heat-based work.
In professional workshops, these fall under OSHA or equivalent regulatory standards, but even hobbyists should borrow safety habits from industrial practice.
Ignoring Proportion & Design Balance
The most subtle yet consequential beginner mistake is overlooking proportion. Jewelry isn’t just a matter of assembly—it’s wearable art. Designers must balance bead size, metal weight, and clasp scale for aesthetic harmony and comfort.
Common Balance Issues
- Oversized beads making earrings uncomfortably heavy.
- Asymmetrical necklaces creating uneven drape.
- Mismatch between bead texture and metal polish.
Design Harmony Strategies
For long-term brand development or catalog consistency:
- Maintain a unified design language—limit to 3 metal tones per season.
- Define weight windows (<50g for earrings, <150g for necklaces).
- Apply the “visual triangle” principle for drop jewelry—it enhances proportion.
In large-scale OEM/ODM operations, design balance guides mold creation and CAD development for consistent product ergonomics.
Conclusion: Learning from Beginner Mistakes for Scalable Success
Jewelry kits represent the perfect entry path for aspiring designers, boutique brand owners, and sourcing professionals to experiment before full-scale manufacturing. But success depends on disciplined application of professional fundamentals—tool knowledge, material selection, measurement accuracy, safety awareness, and structured design planning.
For jewelry brands building their supplier network or transitioning from handmade samples to large-scale wholesale production:
- Standardize QC and plating specs across workshops.
- Invest in training for essential jewelry-making techniques.
- Implement design documentation for precise batch replication.
- Pilot run small MOQs to test supply stability before scaling.
- Partner with an experienced OEM/ODM jewelry manufacturer for technical guidance and cost-efficient production.
When you control craftsmanship at every step—from jewelry kit to full OEM sample—you set your brand up for longevity and quality reputation in the increasingly competitive fashion jewelry wholesale industry.
Ready to upgrade your sample prototypes or request OEM/ODM consultation?
Let’s connect—our team provides one-on-one guidance for brands, wholesalers, and private label buyers seeking high-quality, scalable jewelry manufacturing solutions.