Encouraging creativity in children begins with cultivating the right environment. Many parents find themselves wondering how to organize craft supplies, manage clutter, and motivate artistic expression—all without turning the living room into a chaotic mess of paper and glue. It’s about balance: giving children freedom to create while keeping things functional and safe for everyday family life.
Setting up a craft corner is not just about arts and crafts—it’s about designing a space that inspires imagination, teaches responsibility, and supports learning through play. A little planning goes a long way: choose the right location, materials, and storage system, and you’ll have a workspace that sparks creativity and stays neat.
Whether you’re dealing with a small apartment or a dedicated playroom, a well-designed craft zone helps kids explore freely and gives parents peace of mind. Below we’ll walk through each step—from choosing the space to maintaining supplies—so that your children’s creativity has the perfect home base.
Choosing the Right Location
Light, Safety, and Accessibility
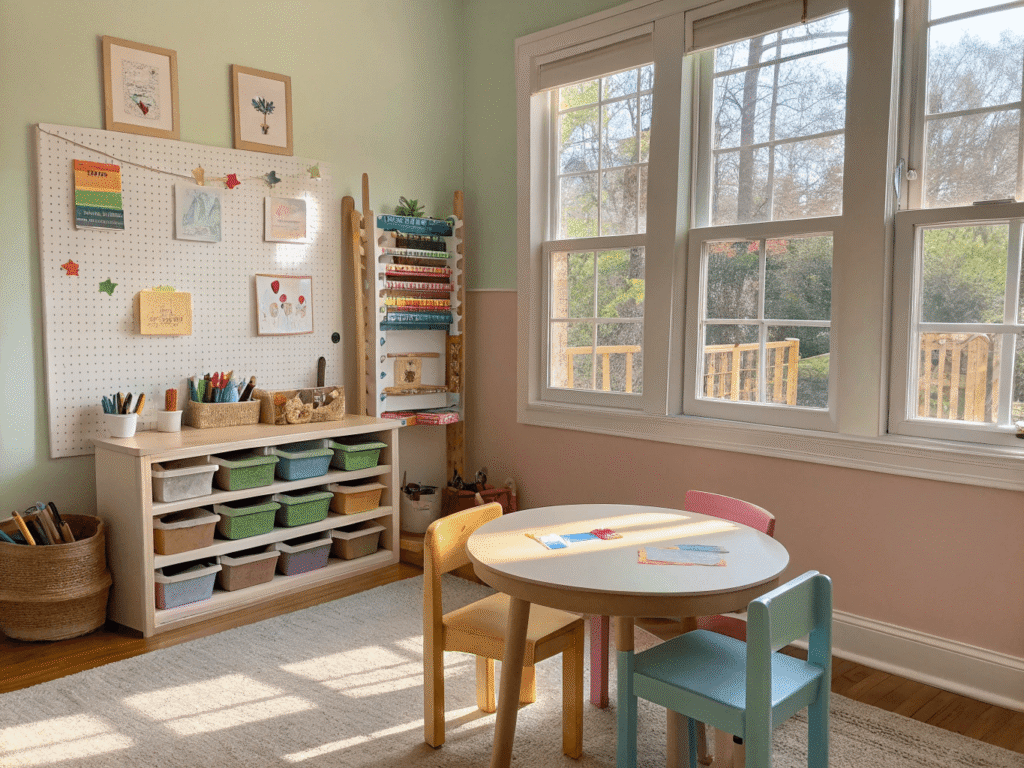
Children thrive in environments that feel open and inviting. Start by picking a well-lit area with plenty of natural sunlight or adjustable artificial light to help with detailed projects. Positioning the craft station near a window not only increases light but also provides ventilation—important when using paints or adhesives.
For younger kids, safety is key. Avoid areas near electrical outlets or sharp corners and use rounded furniture whenever possible. Choose sturdy, child-sized tables and chairs so they can work comfortably without straining.
Space-Saving Ideas for Small Homes
If your home is compact, think vertical. Add wall shelves or pegboards to store scissors, rulers, paints, and tapes. You could also use a rolling cart that moves easily between rooms, keeping art materials accessible but tidy when not in use. Multi-purpose storage—such as under-table bins or hanging pockets—works wonders in tight areas.
| Space Type | Best Setup | Recommended Storage |
|---|---|---|
| Small Apartment | Portable craft cart + foldable table | Stackable bins & pegboard hooks |
| Playroom | Dedicated art station with zones | Shelves + baskets |
| Shared Kitchen/Family Area | Corner table with washable mat | Drawer organizers + labeled jars |
Organizing and Storing Craft Supplies
Group Materials into Categories
Start by collecting all craft items: paper, paint, markers, brushes, glue, scissors, beads, and any DIY kits. Then sort them into clear categories—drawing, painting, building, and decorating. This makes it easy for kids to find what they need and learn how to put items back after use.
Label every container clearly. Use chalkboard labels or printed tags, so even younger kids can identify where things belong. Keeping the labeling simple—like “Paints,” “Stickers,” “Paper”—turns cleanup into a fun and educational game.
Choosing Safe, Clear Containers
Opt for transparent, stackable boxes so contents are visible. Plastic bins are durable and easy to wipe clean after messy activities. For everyday items, smaller baskets or shallow trays placed at eye level encourage self-service. Store delicate materials (like beads or glitter) higher up to prevent spills.
A balanced storage system typically includes:
- Clear boxes for drawing supplies
- Jars or caddies for small tools
- Magazine holders for paper and coloring books
- Pegboards for scissors and brushes

Creating a Safe and Inspiring Craft Zone
Define Activity Zones
Introduce clearly marked zones for different activities—such as a painting area, a cut-and-paste zone, and a building space for crafts like clay modeling or jewelry making. This structure reduces clutter and gives kids a sense of focus.
You can even use washable mats under each zone to protect floors and make cleanup easy. A small sink or washing station nearby helps rinse brushes quickly.
Encourage Creativity with DIY Jewelry and Gift Kits
To combine creativity with learning, try child-safe DIY jewelry kits or gift-making sets. These kits teach color coordination, fine motor skills, and even basic design principles. Make sure the kits include non-toxic, lightweight materials like plastic beads, elastic string, and blunt-edged tools designed for little hands.
How to make it both fun and educational:
- Let kids choose color patterns themselves.
- Teach them simple knotting or beading techniques.
- Discuss shapes and patterns as they work—turning craft time into a mini design lesson.
- Display their creations on a wall or shelf to reinforce pride and accomplishment.
| Kit Type | Suitable Age | Skill Learned | Safety Tip |
|---|---|---|---|
| DIY Jewelry Kit | 5+ years | Coordination & pattern recognition | Use rounded-end plastic needles |
| Gift-Making Set | 7+ years | Planning & personal expression | Avoid hot glue; use non-toxic adhesive |
| Clay & Mold Kit | 4+ years | Sensory development | Keep wipes nearby for easy cleanup |
Maintaining and Refreshing the Craft Area
Keep It Organized and Engaging
The best craft corners evolve with your child’s interests. Set a rotation system—swap out craft types every few weeks to keep activities fresh. Store seasonal items (like holiday stickers or thematic colors) separately and bring them out when the occasion fits.
Make maintenance part of family time:
- Check supplies regularly for dried markers or empty glue bottles.
- Encourage kids to help reorganize, giving them ownership.
- Display their latest artwork to keep creativity alive.
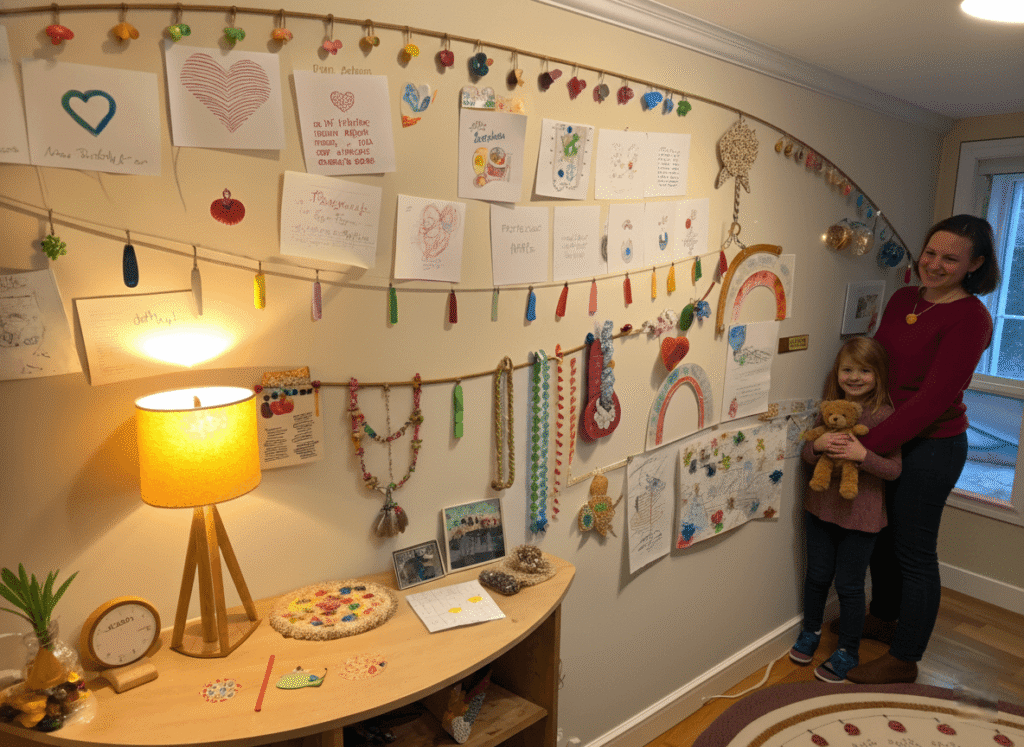
Display and Celebrate Creative Work
Children love to see their work appreciated. Create a small gallery wall using ribbons and clips or corkboards for easy updates. Rotate displayed artworks to keep the space lively and give every new piece its moment.
Displaying finished pieces teaches children to take pride in their efforts and reinforces positive creative habits.
Conclusion: Building Creativity Through Order and Freedom
A well-designed craft corner at home is more than just a play space—it’s a creative classroom. It nurtures imagination, teaches organization, and encourages independence.
By focusing on light, safety, accessible storage, and clean design, you’ll create an area where kids can explore freely without overwhelming your household. Incorporating kits like DIY jewelry or craft gift sets adds educational value while keeping the experience joyful and hands-on.
If you’re a parent or educator designing such a space, these steps will help you maintain order while preserving the spark of creativity. Start small, observe what excites your children most, and expand your craft corner gradually—it will soon become their favorite part of home life.